Belgium
Back to other articles
Content:
Belgium - BE
| Official language | Dutch, French and German |
| Capital | Brussels |
| Largest cities | Antwerp, Ghent, Charleroi, Liege, Brussels, Bruges |
| Currency | euro EUR |
| ISO Code | BE |
| Telephone code | 32 |
| Timezone | CET (UTC 1, summer UTC 2) |
| Car traffic | right-hand |

Gas station network
Shellgo to website
Q8
Esso go to website
ENORA CNG go to website
Lukoil go to website
Total go to website
Bans on weekends, holidays, seasonal
There are no restrictions on the movement of trucks on weekends or holidays.
Features of driving at night
Belgium has no general restrictions on night traffic
Winter driving features
Belgium does not have legal requirements for the use of winter tires. Snow chains are only permitted on roads covered with snow or ice. Studded tires are prohibited
Autobahn network
In Belgium, roads are divided into
- Motorways in Belgium are marked with an A and a number. However, the European numbering system is most often used for the international E road network. However, there is not always a one-to-one relationship between the two numbering systems along the entire length of the motorways. Example: A1 (E19): Brussels - Antwerp - Breda, A1 (E19): Brussels - Antwerp - Breda
- Ring roads Ring roads around large cities have their own numbers. Names start with the letter R, then with the first digit for the province, and sometimes with the second digit to distinguish between the different ring roads. Example R0 is the outer ring road around Brussels. The R20 and R22 are (parts of) the inner ring roads around Brussels.
- National roads are numbered according to the national scheme and are identified with the letter N followed by a number. The main national roads diverge from Brussels, numbered clockwise: N1: Brussels - Mechelen - Antwerp, N2: Brussels - Leuven - Dist - Hasselt - Maastricht
- The minor national roads, numbered with 3 digits, are provincial roads, their first number indicates the province in which the road starts:
N1xx Antwerp Province
N2xx Provinces Flemish Brabant and Walloon Brabant
Liefkenshoek Tunnel
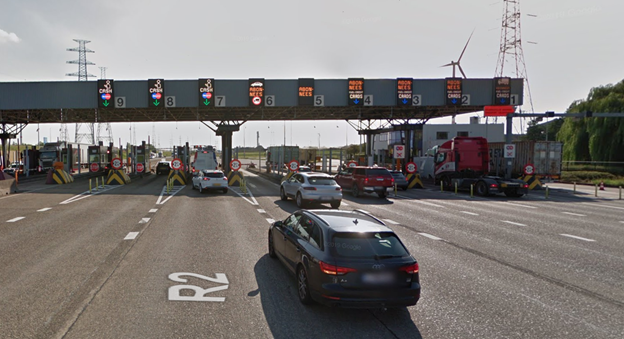
Liefkenshoektunnel is a toll tunnel between Antwerp and Beveren under the Scheldt River.
The tunnel is an extension of the R2 highway, the ring road that surrounds Antwerp's city and harbor.
There is one toll collection point. It is located on the south side of the tunnel.
The toll station consists of 18 lanes, 9 lanes in each direction (numbered from 1 to 9),
The lanes are equipped with automatic sensors for determining the height of the vehicle, with which you can accurately determine the category of the vehicle.
Tunnel fare depends on vehicle height, payment method (depending on the chosen lane), and travel time
|
Strip for all payment methods |
Card payment strip |
Payment by device |
|
| Category 1 (height 3m) | 6 | 4.95 | 3.56 |
|
Category 2 (height 3m) (from 06:01 to 21:59) |
nineteen | 17.60 | 14.16 |
|
Category 2 (height 3m) (from 22:00 to 06:00) |
6 | 4.95 | 3.56 |

stripes are for card payments
Accepted Visa card, Eurocard-Mastercard, Shell Cards, DKV, UTA, Routex, Eurotrafic, Total National Fleet, American Express.

The lanes where you can contact the toll operator with "all" payment methods.
 stripes are for payment by the device

Payment for roads
The Satellic system is used to pay for roads in Belgium
The device looks like this

In addition to the native Belgian device Satellic, the Axxes combined device is used to pay for Belgian roads .
It looks like this
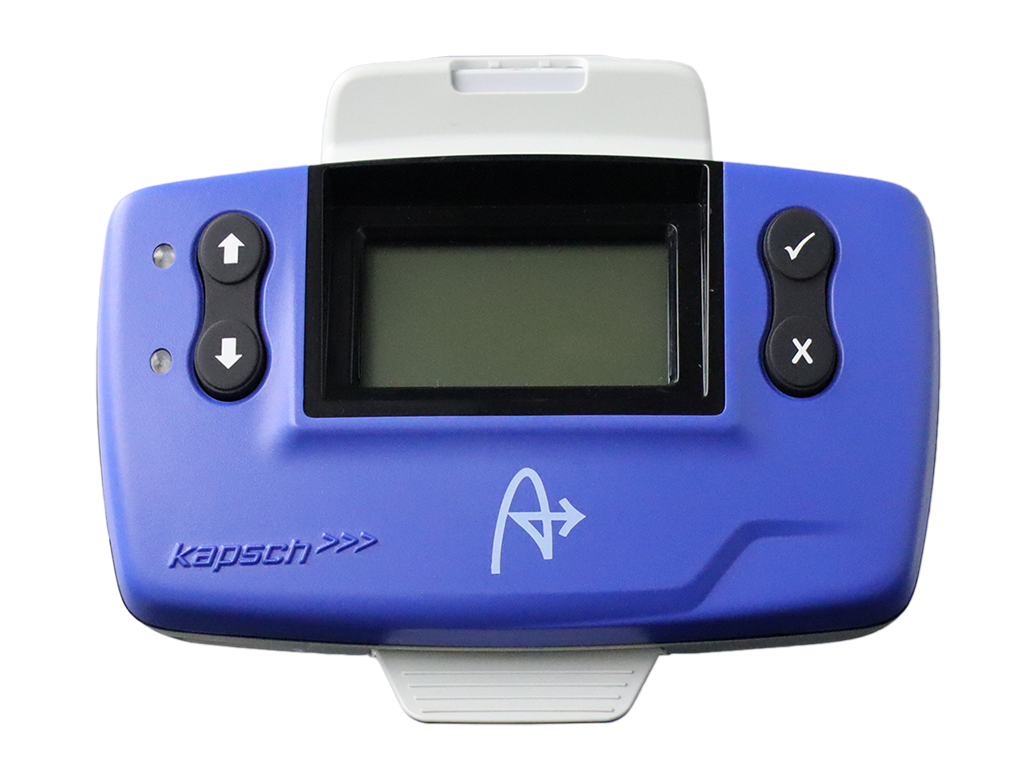
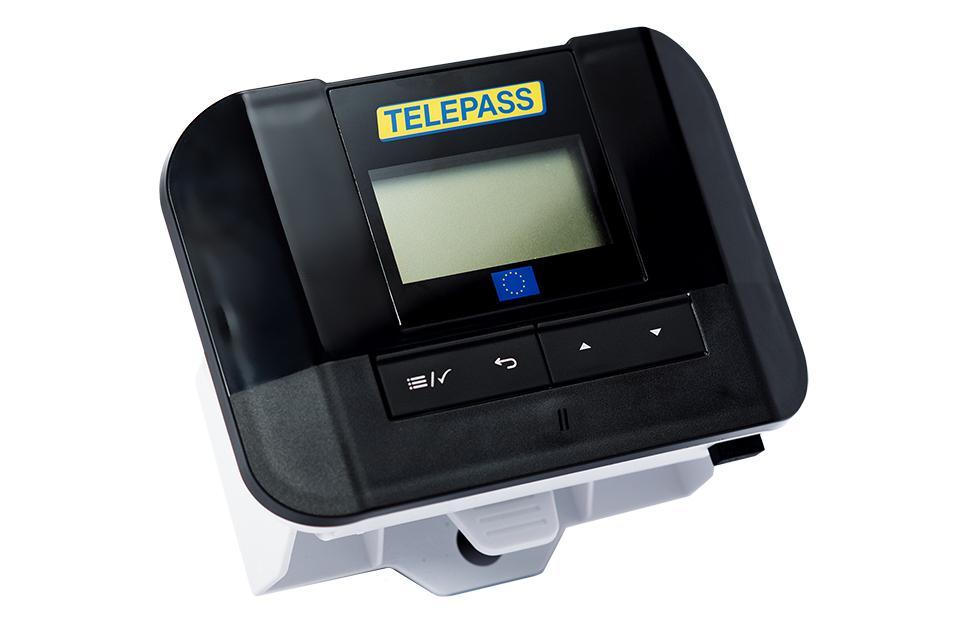
Or with the TELEPASS universal device
It looks like this
There are two ways to get the Satellic:
- register on the Satellic portal https : // rup . satellic . be / and the device will be sent by mail within a few days
- if the device is needed immediately, it can be obtained at the point of sale of devices, the nearest one can be found on this map
How to register on the portal
1. To register, go to the portal http : // www . satellic . be and select MY ACCOUNT in order to go to the user's account

2. Select Register
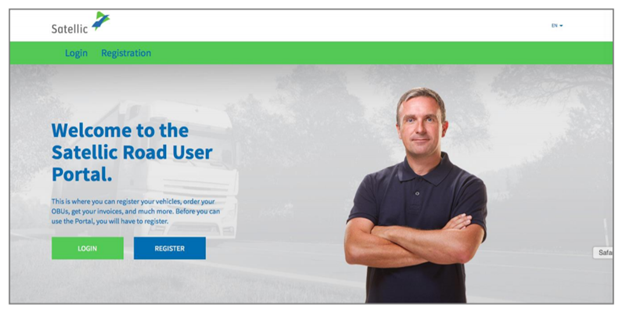
3. Select BUSINESS CUSTOMER or PRIVATE CUSTOMER and fill in the appropriate fields
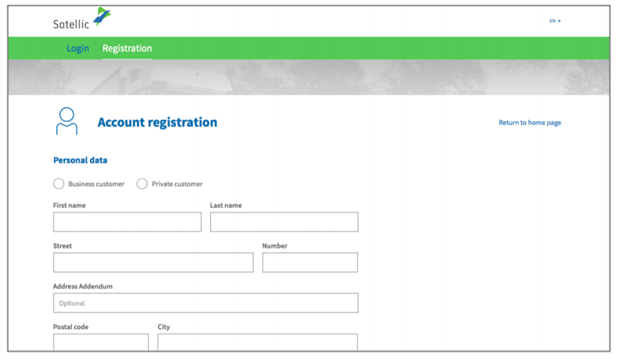
4. Accept the Privacy Policy and Terms of Use and click NEXT

5. Make sure that the data entered is correct and click CONFIRM (confirm)

6. You will be sent an email with an activation link
7. Complete the registration by clicking on the link in the letter, the link is valid only for 24 hours

8. You have successfully registered on the portal http : // www . satellic . be
How to get the device at the point of issue
The nearest pick-up point can be found on this map
such special kiosks are located at the points of issue
Appearance and elements of the device issuing terminal:

- The identification number of the terminal to pay toll
- Touch screen
- RFID Reader for OBU Scan
- OBU dispenser for new OBUs
- Old OBU Return Box
- Document scanner
- Payment terminal
- Receipt printer
- Fuel / credit / debit card slot
- Cash acceptor slot
- Change dispenser
- Customer service phone number
Receiving the device
1. Select a language - the interface is available in four languages

2. Enter your country and registration number and click Next .

3. Click Get an OBU.

4. Click Get an OBU without account 1 and click NEXT 2.

5. Enter the maximum permitted mass in the road train and press NEXT (CONT)

6. Enter the EURO vehicle class and press NEXT .

7. Place the document in the scanner with the text facing the glass. Close the door and press Scan document 1. Remove the document after scanning. On the next screen, click CONTINUE .
What documents need to be scanned? To confirm the data on the registration number of the car, country of manufacture of the vehicle, weight and environmental class of the engine, you need to scan one or more of the following documents: registration documents, identification report, technical data sheet, EURO certificate, image of the manufacturer's plate.

8. To scan another document, click Scan document 2. Otherwise click NEXT

9. Select the check box for the expression of consent to the terms and conditions and click CONFIRM (CONFIRM).

10. Press YES to print a confirmation or NO if you do not want to print a confirmation.

11. Click Get an OBU.

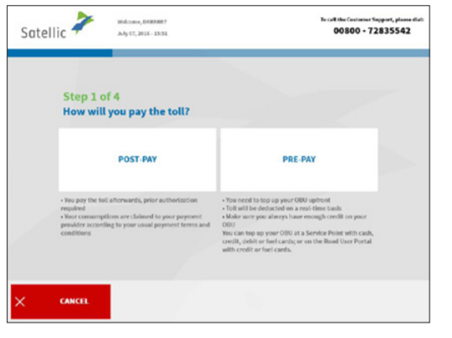
12. Select a toll payment method. Prepayment is used as an example in this procedure.
13. Select the OBU deposit method (135).
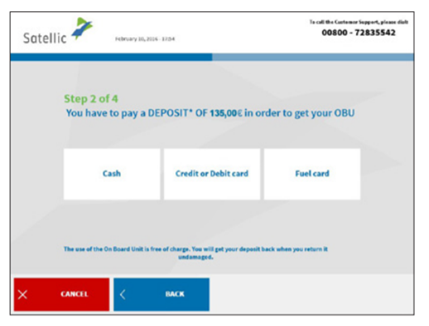
14. Post a deposit (cash or credit card) and follow the instructions on the screen of the payment terminal.

15. Receive a check and press NEXT .

16. After 1 minute, remove the OBU.
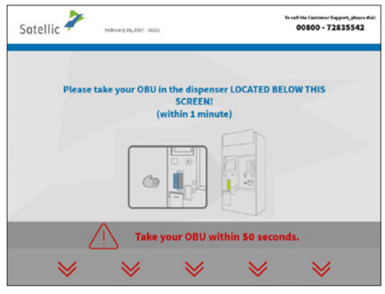
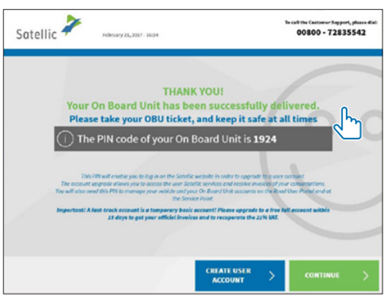
17. Retrieve the check on the OBU ( you should always have the PIN at hand!) And press CONTINUE .
How to top up OBU
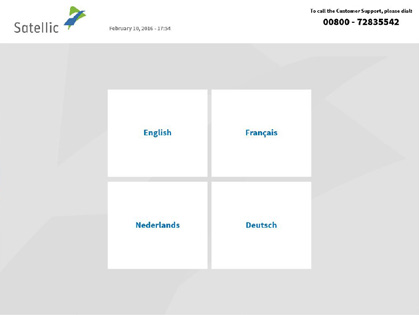
1. Select a language.
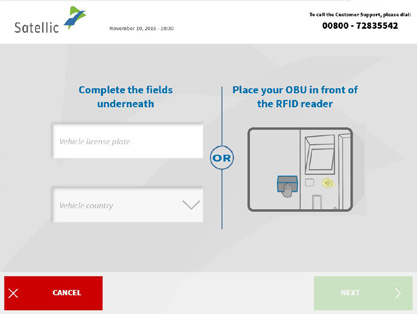
2. Place the OBU in front of a radio frequency identification ( RFID ) reader or enter your vehicle's license plate and country where it was registered. The fastest option is to scan the OBU installed in front of the RFID reader.
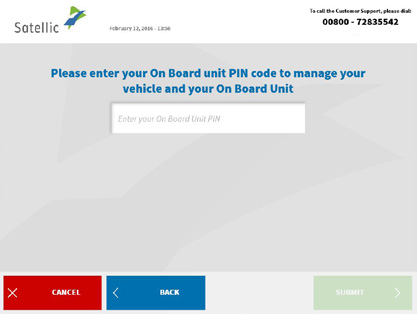
3. Enter the PIN- code of the on-board unit and press the SUBMIT button. The PIN is presented on the receipt provided after the OBU was issued or on the Road User Portal ( RUP ).
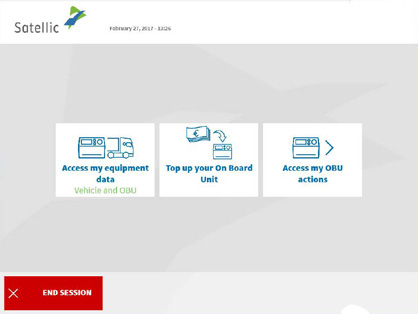
4. Select Top up your OBU.
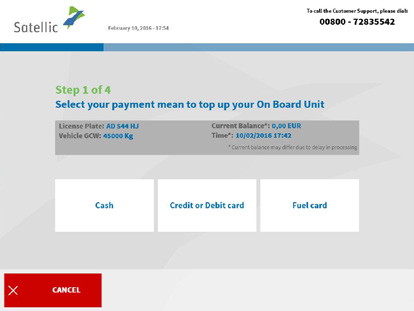
5. Select a payment method. Possibility to pay by cash, credit or debit card or fuel card
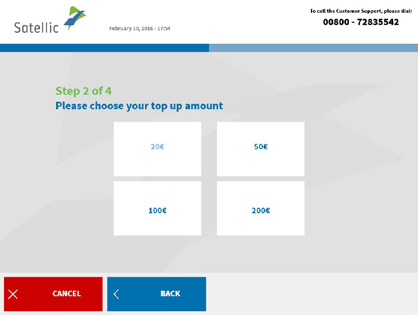
6. Select the top-up amount. Please note that the first time you top up the OBU, you need to credit at least € 50. Thereafter, the minimum top-up amount will be € 20.
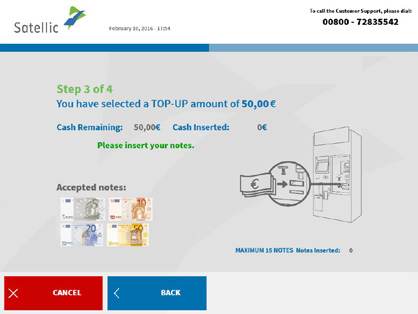
7. Pay this amount and follow the instructions on the screen of the payment terminal, then print the receipt.
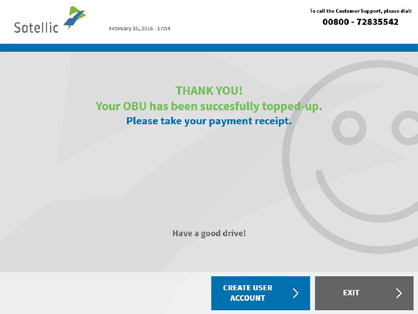
8. Replenishment of the OBU was successful.
How to return the Satellic
You can return the Onboard Unit ( OBU ) by contacting a service center. You must also return the power cable, battery and suction cups with the OBU.
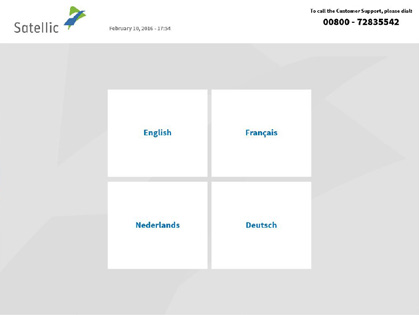
1. Select a language.
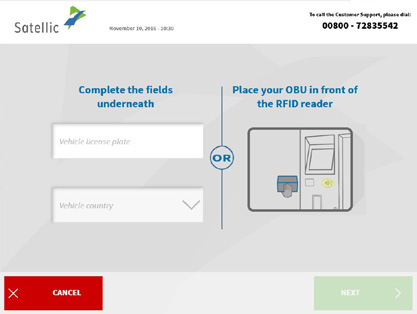
2. Place the OBU in front of a radio frequency identification ( RFID ) reader, or enter your vehicle's license plate and country where it was registered. The fastest option is to scan the OBU
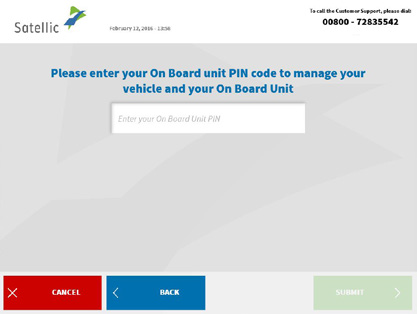
3. Enter the vehicle unit PIN and press the SUBMIT button. The PIN code is presented on the receipt that was provided after the OBU was issued
4. Select Access my OBU actions (Access to the action with the OBU).
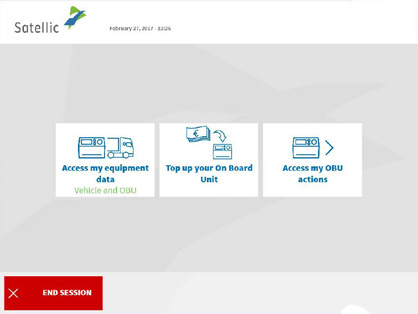
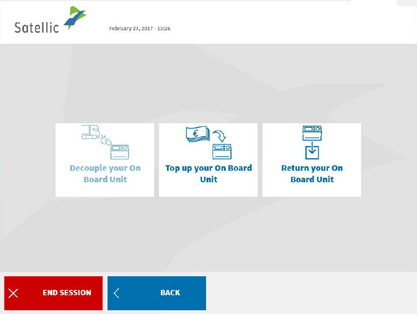
5. Select Return your OBU .
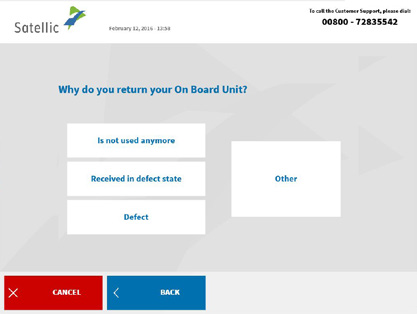
6. State the reason for the return.
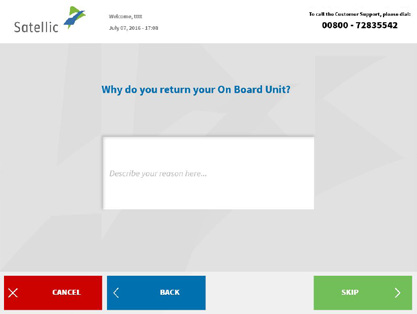
7. If OTHER is selected , enter the appropriate reason yourself. Select CONFIRM.
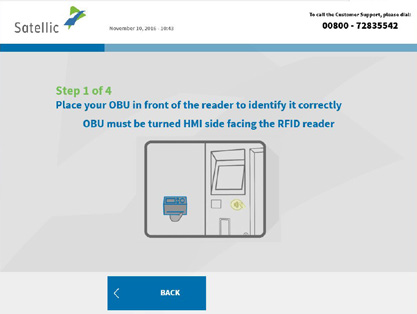
8. Place the Satellic logo in front of the reader and identify. To do this, the OBU must be turned with the display (face) towards the RFID reader.
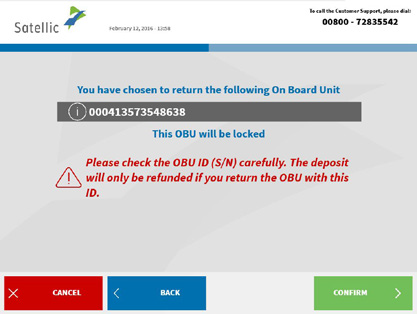
9. Check the OBU ID ( S / N ) with the one printed on the sticker on the back of the device. If the number matches, press CONFIRM (CONFIRM). Otherwise, press BACK .
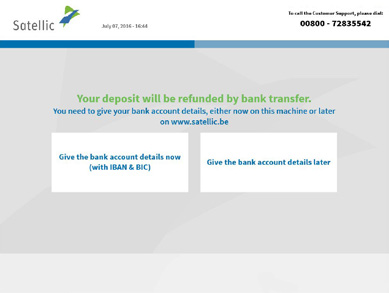
10. The money deposited for the OBU will be refunded via bank transfer. You can provide your bank account details now or later at a service point or on the road user portal. Select Give my bank account details now if you want to provide information now, or click Give the bank account details later .
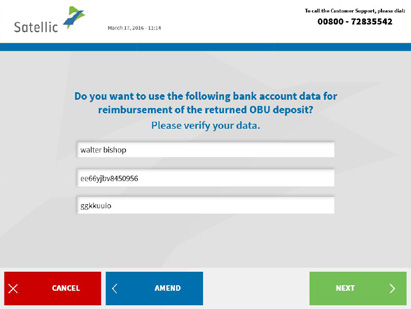
11. Enter the following bank account details: bank account holder, international bank account number (IBAN), bank identification code ( BIC ). Click NEXT.
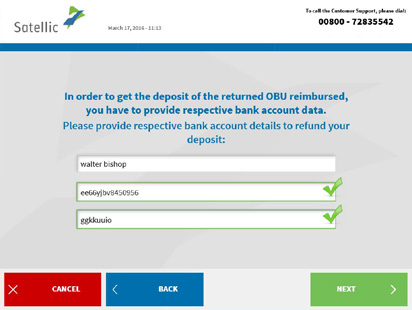
12. After pressing NEXT, check the entered data
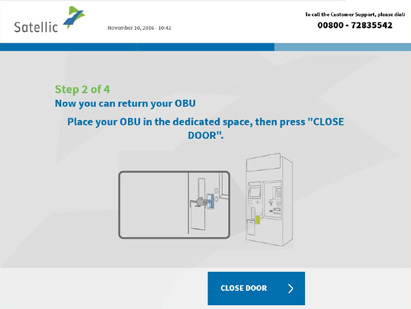
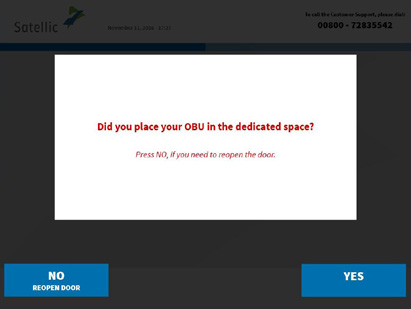
13. Place the OBU in the return OBU container (green indicator). Make sure the blister has been removed from the OBU . Confirm your choice by pressing YES on the next screen after installing the OBU in the slot
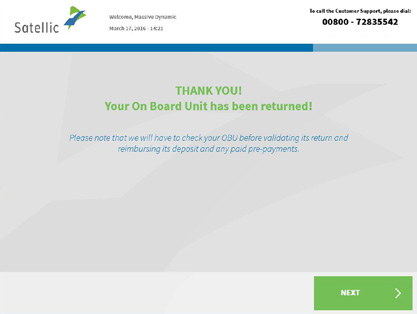
14. The return of the OBU has been successfully completed and the money will be returned via bank transfer to your registered account within 30 days of verifying the device.
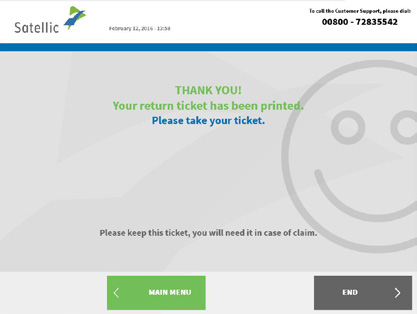
15. Your receipt is printed. Pick it up and store it in a safe place as you will need it in case of a complaint. If you want to return to the original screen, press END . If you wish to perform other procedures at the service point, press the MAIN MENU .
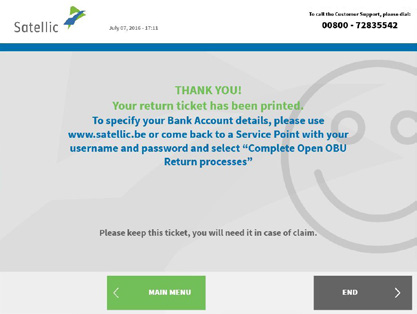
16. Satellic Company will not be able to reimburse the deposit if you do not provide your bank account number (IBAN and BIC codes). You can enter your bank account details on the road user portal or at a service point. To do this, you need to log in using your user name and password and select the option Complete Open OBU Return Processes (Run OBU return procedure
Price per km of travel in Belgium


